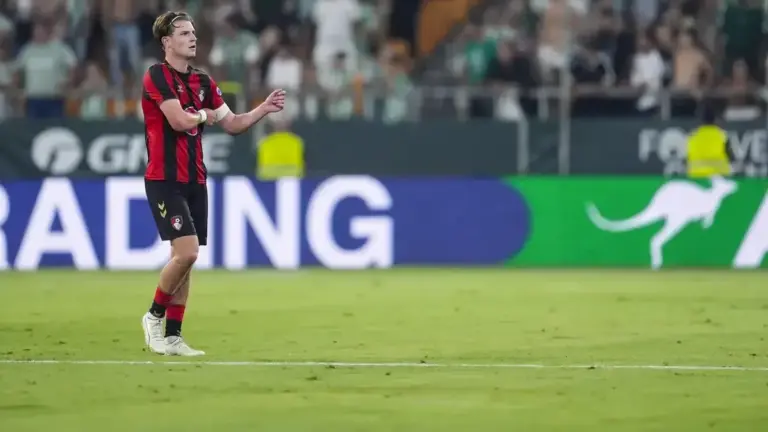
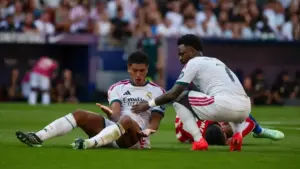
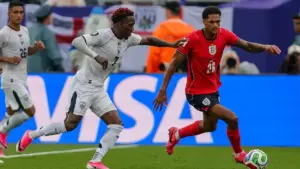
Real Madrid’s derby hoodoo has not lifted. Diego Simeone’s Atletico Madrid won 2-1 in Sunday’s La Liga derby, on matchday seven of the season, and Jose Mourinho now has to explain how his side lost control of a game he set up to win. This Real Madrid tactical breakdown looks at the patterns behind the defeat, using Marca’s detailed reading of Atletico’s plan and the words of Simeone himself. A year ago Atletico won the same fixture 5-2 under Xabi Alonso, and some familiar problems resurfaced on Sunday, even if the shape of this defeat was very different. Anyone who missed the game should start with our derby match report and ratings before working through what follows.
Expected Goals (xG) & Advanced Data Analysis
Derbies rarely follow the script the underlying numbers suggest, and this one was no different. Real Madrid had spells of control in possession, but control of the ball is not the same as control of the game. Atletico Madrid’s approach was built around field tilt in their own favour when it mattered, pulling Madrid out of shape and striking in the moments that count most.
Concepts like PPDA (passes per defensive action) and rest-defence structure explain why Sunday’s result felt earned rather than fortunate for Atletico. A low PPDA reading points to a team pressing with real intent high up the pitch, forcing mistakes rather than waiting for them. Atletico have built their identity under Simeone on exactly that kind of relentless, coordinated pressure, and it showed again at the derby.
Real Madrid’s problem was less about chance quantity and more about chance quality conceded. Zone 14, the central strip just outside the box, is where the most dangerous final passes are played from, and Atletico found joy there by dragging Madrid’s midfield out of position first. Once that zone opened up, the game state shifted, and the scoreline followed the pattern rather than defying it.
A 2-1 defeat with spells of Madrid pressure will always invite the question of whether the result flattered the winners. On this occasion it did not. Atletico’s game plan, as Marca’s analysis lays out below, was built to exploit specific structural gaps in Madrid’s setup, and those gaps produced the chances that won the match.
That is the uncomfortable part of any honest Real Madrid tactical breakdown of this derby. The loss was not a fluke of variance, it was a plan that worked, executed with the sort of discipline Simeone’s teams are known for. Madrid will have watched the footage back and known exactly where the game turned, because the pattern repeated itself too often to put down to coincidence.
Lesson 1: Rest-Defence Structure and Zone 14 Exposure
Rest-defence describes how a team is shaped behind the ball while it attacks, the players and passing lanes left in place to stop a counter before it starts. Get that structure wrong against a coach like Simeone and the punishment tends to arrive quickly. Madrid’s rest-defence came under repeated strain down their right side defensively, which is Atletico’s left, and the pattern kept recurring through the first half.
Marca’s post-match analysis offered a detailed account of how Atletico worked that zone. According to the paper, the plan centred on the space in behind Madrid’s right-back area and the players expected to cover it:
It was no coincidence that Giuliano Simeone repeated his impact on Atletico’s right flank as he did in last season’s derby, wearing down Carreras. However, the plan this time focused more on two aspects: with Vinicius not tracking back to defend (although he did initially return, he barely did so in the first 20 minutes, leaving Tchouameni trying to cover), they had to exploit the lack of support for Gallagher and Huijsen’s hesitation. So, the aim was to intensify the presence in that area with a dribbling player (Kang-in Lee) and three of the team’s strongest players (Pubill, Llorente, and Giuliano himself) to make the task of the centre-back and full-back almost impossible
That is Marca’s reading of events, not an uncontested account, and it should be treated as informed analysis rather than settled fact. Even framed that way, it lines up with what many Madrid supporters felt watching the game live. Tchouameni was regularly the spare man trying to plug a gap that should not have been his to cover alone.
The Zone 14 exposure that followed was a direct consequence of that overload. Once Atletico’s runners committed numbers to the right-hand side, Madrid’s midfield had to shift across to help, and that shift opened the central channel Atletico wanted all along. Huijsen’s hesitation, as described in Marca’s account, is the kind of detail that matters most in games like this, because a split second of doubt is often all a side as well drilled as Atletico needs.
It is the same lesson Xabi Alonso’s Madrid never quite solved twelve months earlier in that 5-2 defeat, and it resurfaced here under Mourinho in a different but familiar shape. Two different managers, two different systems, and yet the same structural question keeps returning to haunt this fixture. That repetition is what should concern the club most, more than the scoreline itself.
Lesson 2: Right-Flank Overloads and Half-Space Manipulation
Kang-in Lee spent last season looking like a central forward option, someone Mourinho could pair with Jonathan David through the middle. On Sunday, Atletico’s setup forced Madrid to think about him in a completely different area of the pitch. The South Korean was deployed out on the right, despite his more natural role as a dual forward alongside David, because that is where the derby was actually being played.
Half-spaces, the corridors between the touchline and the centre of the pitch, are where modern full-backs and wingers are stretched thinnest. A winger and a full-back can usually cope with a straightforward wide overload, but half-space runners drag defenders into positions where they have to choose between two threats at once. Atletico loaded that zone with runners rather than relying on one isolated winger, and Marca’s analysis detailed exactly who was involved and why each selection mattered:
This explains why the South Korean player was deployed on that flank despite playing as a dual forward alongside Jonathan David, why Pubill attacked as a full-back, and why Llorente started as a holding player. The purpose of the latter, in addition to marking Bellingham defensively, was to contribute to the attack on that flank. Similarly, the presence of Cardoso in the double pivot, rather than Koke, was determined by the need to cover Marcos’s back when he pushed forward into Real Madrid’s weak zone
What stands out in that breakdown is how many roles were built around a single objective. Llorente was not just picking up Bellingham, he was also adding a body to the overload once possession was won back. Cardoso’s inclusion ahead of Koke was not about individual quality so much as balance, covering behind Marcos so the right-sided overload could keep pushing forward without leaving Atletico exposed themselves.
That is a coordinated, structural plan rather than one player exploiting one mismatch. Four or five roles were adjusted to serve the same idea, and Madrid’s back line had to solve a problem with numbers stacked against it. Kang-in Lee’s ball carrying, Pubill’s overlapping runs, Llorente’s double duty and Giuliano’s relentless running all point the same direction, and Madrid never found a clean way to nullify all four at once.
Any Real Madrid tactical breakdown of this defeat has to start from that overload, because everything else in the game grew out of it. Fuller context on how both managers set their teams up beforehand is in the tactical build-up to the derby.
Lesson 3: Tactical Adaptations Under Mourinho vs Simeone Strategy
Simeone’s message before the game, and in his approach to derbies generally, has always been about location as much as intensity. He wants the ball played into areas where his players can do damage, not areas that simply look impressive on a heat map. Asked about his approach, he summed up the thinking simply:
We must take the game to where we can hurt them.
That is exactly what happened. Atletico did not try to dominate territory across the whole pitch. They picked one flank, loaded it with runners and pressers, and trusted the plan to create repeatable chances rather than one moment of individual brilliance. It worked because every player understood the specific job attached to that plan, from Pubill’s overlaps to Cardoso covering behind Marcos.
Mourinho’s Madrid, by contrast, looked reactive once that overload took hold. There were spells of good football, and Madrid had their moments in the first half, but the response to Atletico’s right-sided pressure came too late to change the pattern of the match. Full details of what Mourinho said afterwards, including his view on the officiating and the balance of the game, are covered in Mourinho’s post-match reaction.
The wider context matters here too. This is now back-to-back heavy derby defeats for Madrid, first the 5-2 under Xabi Alonso and now this 2-1 loss under Mourinho.
The shape of the two games was very different. Last season’s meeting was chaotic and open. Sunday’s was tighter and more calculated, and in some ways that makes it more worrying, because it points to a repeatable plan rather than one bad afternoon.
Simeone has built a side that repeats its patterns with real discipline. Until Madrid find a consistent way to defend that right-sided overload, Atletico will keep going back to the same plan, because why change something that keeps working.
That is the clearest lesson from this Real Madrid tactical breakdown. The problem is structural, and it has now shown up in two consecutive derbies under two different managers. For a club with Madrid’s standards, that repetition is the part that should worry Mourinho most heading into the next meeting.
Further analysis from Goal’s tactical report on Simeone’s strategy is well worth reading in full for anyone wanting the complete picture.